
How to make a garden from scratch
2024-08-29T11:18:26+10:00
Learn the stages of planning, preparing and installing the plants and other bits and pieces that make up the garden space of your dreams.
Part 1: Assess what you have and dare to dream
The first part of making a garden from scratch is all about working out what you’ve got and what you want. Even if you’re getting a professional in to design your garden, doing this first is still very helpful for creating a design brief and getting your mind focused on what you really need or want.
Be realistic about what you already have with regards to space, sun, existing structures, trees, shrubs and weeds. Think of the challenges each might present, and the opportunities they create. Large trees may cause root competition but also create shade and habitat, and can be visual focal points.
What do you want in your garden?
Knowing what you want makes a huge difference. To start with, make a list of everything your heart desires, from general items, such as an entertaining area or vegie garden, through to specific wishes, such as a place to meditate. The list can be pared back later, in line with your space, time, budget and practical constraints. For example, there’s no point setting up a large garden with a lot of plants and high water requirements if there’s no mains water and you’re relying on erratic rainfall. But for now, think big! Here are a few ideas to get you dreaming.
| GENERAL | PRACTICAL | PLANTS |
|---|---|---|
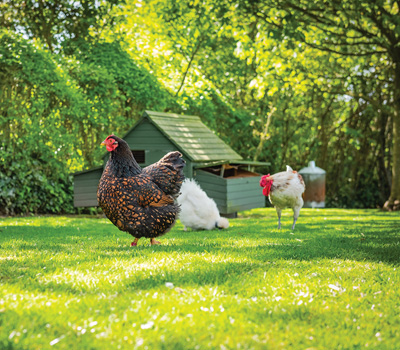
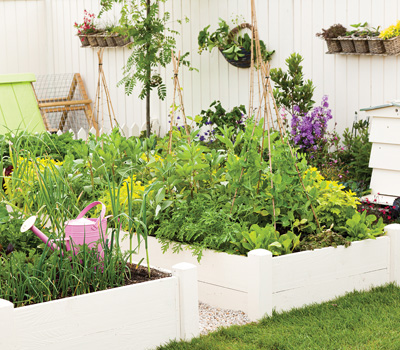
| – Outdoor entertaining area – Quiet space for reflection, meditation, yoga or just breakfast! – Vegie patch – Orchard: which fruit trees and how many? – Herb garden – Lawn for kids and pets – Play area for the kids – Pet-friendly garden – Chooks – Wildlife, including birds, bees, and butterflies | – Storage shed – Utility area – Pottering shed or potting bench – Composting area or worm farm | – Do you want to include any for picking, or for their perfume, or to attract wildlife? – Maybe you have a favourite tree or flower, or there might be a plant that reminds you of the garden you grew up in, or someone special in your life |
What do you want for your garden?
Here are some ways to make your garden work for you:
- Wind reduction: This can be achieved by careful plantings of trees and shrubs to act as windbreaks, which can make your outdoor spaces more liveable.
- Feeding your family: Many people start growing some of their own produce due to concerns about food security, the freshness, quality and chemicals used, and the increasing cost of the perishable food we buy.
- Privacy: Good garden design can also shield you from neighbours, or roads and traffic noise – although it may take a couple of years for some of the plants to grow sufficiently to do so.
- Improved property value: It’s worth remembering that a good garden will greatly improve the value of your property. Many agents will tell you that a prospective buyer can be sold on a property by the front door if there’s a good garden.
How do you want to feel in your garden?
Gardens evoke feelings – relaxing, comforting, inviting, vibrant, exciting and so on. It’s the way the space has been arranged and the types of plants growing in a garden that help to create the mood. If you’re not quite sure, think about the gardens you’ve visited and loved, and try to recall how they made you feel. Visiting other gardens can help you focus your ideas on what you do (and don’t) like. Taking time to think these things through can streamline your ‘dreaming’ process and make it a lot easier and more enjoyable.

Part 2: Make a plan and improve your soil
Create a mud map of your garden
There are all sorts of computer-aided drafting programs out there to help you do this electronically, but it doesn’t need to be complicated. You might just grab a screenshot of your property from Google Earth, then trace the outline of your block onto an A2 or A3 piece of paper.
You can also simply sketch it by hand. Measure the width and depth of your property, then draw where your house sits on the block, along with the placement of any existing fixed features, such as buildings, large trees, and paths or driveways. Indicating where the house’s doors and windows are also helps you design for easy access and to take advantage of the view from inside.

Work out a design… or three!
Make several copies of your mud map, then sketch out some different possibilities that might work with your layout, and the shapes and sizes of the areas you want, such as entertaining areas, vegie patches and trees or hedges. This is the fun part, and you need to be prepared to play around with different ideas until you hit upon one or two that you’re happy with.
Lay it out
Once you have a design or two to play with, transpose it onto the bare ground using stakes, hoses, string line, or a can of marking paint. Lay out the plan in your garden space, and try living and interacting with it for a week or so to see how it works.
Sometimes designs work on paper, but ‘on the ground’ other factors come into play. You may realise that a gorgeous tree in a neighbour’s yard could be a focal point, so you adjust your plan to take advantage of its magnificence. There’s an old saying: set your goals in concrete and your plans in sand – be flexible when taking your ideas from paper to the physical form.
The next step is to assess and improve your soil! Read here.
Part 3: Plan and prioritise the hardscaping
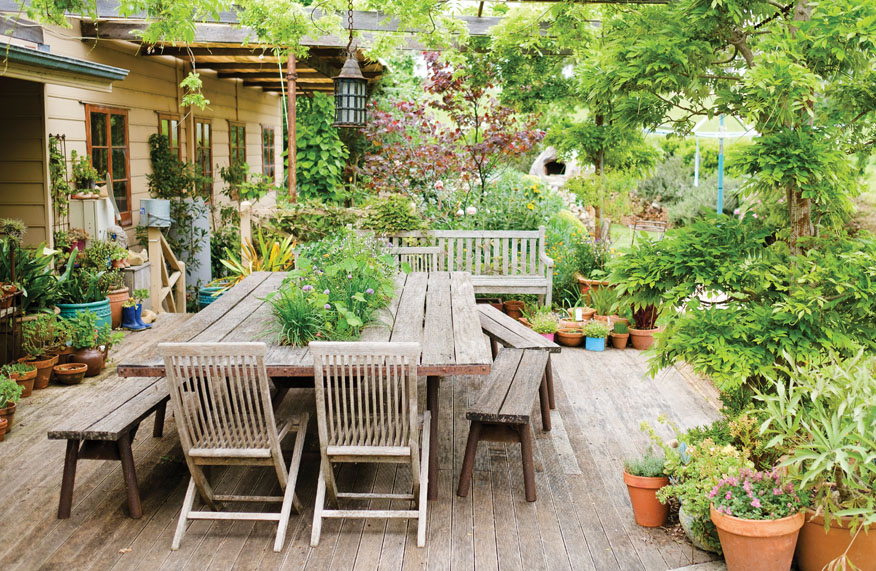
Hardscaping refers to the hard elements that are included in a garden – basically, everything apart from the plants. This includes paths, decks, pergolas, screens, retaining walls, raised beds, sheds and internal fences. It also extends to items such as cubbyhouses, sandpits, chook runs and compost bays.
When you’re creating a garden, these elements are the ones that can cost big bucks. And this is where people often become stuck, waiting for the time and funds to make these elements a reality.
It’s logical to build all the hardscaping before planting anything. However, if this is going to delay your garden by months or years, you could consider leapfrogging this step, and come back to it later.
With careful planning, it’s possible to start creating your garden around where the hardscaping will go, then return to the hardscaping when the money and labour hours become available. Although this may seem like you’re double handling an area of the garden, if the processes are thought through properly, it can work very well. In short, my advice is to always plan for the hardscaping from the beginning, then do it as your budget permits.
Part 4: Choose and buy your plants
Finally, it’s time to get some plants. How exciting! However, just when you thought all the hard decisions were behind you, it starts all over again. Which plants? How big? Where do you get them from? You’ll no doubt find everyone, from your friends and relatives, to the staff at your local garden centre, ready to give you their suggestions! So, let’s break down the process, from plant selection to the best order for planting.
Plant selection
I would suggest that the bulk of the plants you choose are compatible with the climate and microclimate of your garden. How do you know what’s climate compatible? The obvious way is to choose local indigenous plants, sometimes referred to as endemic plants. These are native plants that either grow or once would have grown in your local area.
Beyond that, choose native plants from similar climatic conditions, but not necessarily your area. For example, do you get summer rains or are you in a summer dry zone? Look for plants from similar regions. Just because a plant is native to Australia, doesn’t mean it will grow well in every part of the country, as we have such variable conditions across the continent.
Looking further afield, consider exotics – plants from other countries – but still be mindful of how the preferred conditions for that plant match up with your climate.
None of this means you can’t grow the plants you want to grow. If you want to grow, say, fuchsias in a hot, harsh climate like South Australia’s, you’ll need to grow them in a shadehouse and give them some extra water through summer. It’s doable, but you won’t want to have to give all your plants that kind of special care.
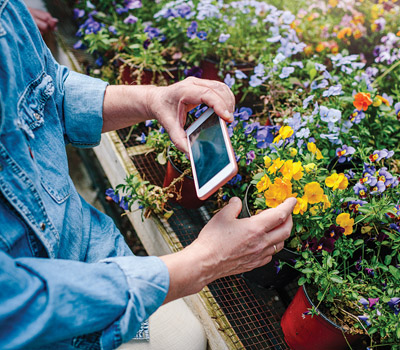
Another great option is to take a look around your local area and observe plants you like that are growing well, and appear to be thriving without too much care or attention. If you aren’t sure what the plants are, take a photo of them and ask at your local nursery or garden centre.
What to do when
1. Choose a tree: The first thing I like to do is plant trees and set up other structural elements, such as hedges, screens and windbreaks. If the timing isn’t right to put your trees in, say, because you’d like to wait until winter when they’re available as bare-rooted stock (making them more affordable), simply put stakes in the positions where you want the trees to go, then work around them as if they were already planted.
2. Add screening plants: Ater the trees are in, I like to plant hedges, screening plants or windbreaks. These all add structure to the garden, while providing some definition, privacy and shelter from prevailing winds. Again, don’t think that you need to buy extra large specimens, as the smaller plant sizes often take off quicker and grow better. Get local advice on how far apart they should be planted to get the best effect, and how far away to position them from fences. Often, I see hedge plants planted too closely, and this can cause them to become stressed in the long term. Varieties such as lillypilly, photinia and viburnum are often planted 1m apart. Plant them too far apart and they’ll take forever to join up; too close, and you’ll have wasted money, and the plants may stress each other.
3. Decide on a focal point: This a good time to place a focal point in the garden to create impact and draw the eye into the space. There are so many possibilities, from urns and pots, to water features, sculptures or benches, and they can transform a good garden into a great one. Even if you haven’t yet decided what specific feature you’d like, use a stake or other object to mark its position and approximate size until you find the right one.
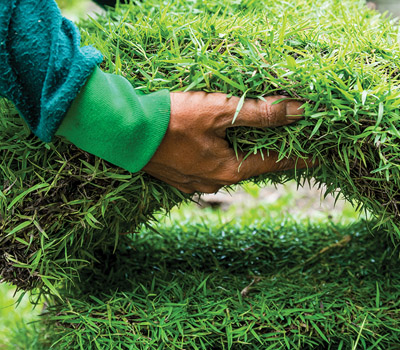
4. Lay a lawn: Lawns can also go in at this stage, transforming your garden almost instantly. However, the options here can be a bit overwhelming: what turf variety should you go for, and should you plant seed, plugs or instant roll-out turf?
Ask your local turf supplier which turf variety grows best in your area, but be aware of the weedy, invasive potential of the running varieties, such as couch and kikuyu, which are almost impossible to get out of garden beds once they get in. I need a tough running grass to survive my harsh, summer-dry climate, but I choose to grow soft-leaf buffalo, as it only invades above the ground, not below. If it gets into my garden beds, I simply pull it out. I tend to use instant roll-out turf, as it beds down very quickly and forms a dense mat, which limits the opportunity for weeds to seed in. While growing from seed or plugs (roll-out turf cut into little squares) is cheaper, you need to be vigilant to keep the weeds out until the grass forms a cover.
5. Add structure and form: Structural plants, such as roses, shrubs or strappy-leafed plants, go in next and take up permanent space in beds. Aim for a combination that flowers at different times of the year, with varied, interesting foliage, and contrasting forms. Again, I’d suggest purchasing small plants, as they will establish better. If you plan to use several roses, you could wait for bare-rooted roses in winter when they are half the price. As a general rule, I allow about one plant per square metre for roses and dwarf shrubs, and one plant per 1.5–2 square metres for medium to tall shrubs. I like things to grow into each other, so the plants cover the ground when established.
6. Define your borders: If you like definition in a garden, add border plants to the front of beds. Use the same plant repeated for extra impact, or a complementary mix to create a finished effect. To save money, look for seedling punnets or six-packs of low-growing plants, or larger, fuller pots of plants that can be divided, such as dwarf Peruvian lilies or catmint. If you’re on a limited budget, you could complete borders of special plants that cost more by planting one plant every few metres, then dividing them every year (or when big enough) to fill the gaps in between. In the interim, you could use low-cost annuals, such as alyssum, or short-lived perennials to fill the gaps and add some cheer.
Part 5: Get planting
Of all the different activities involved in gardening, I’d say that planting is the best part. But there are a few things to keep in mind to ensure you give your plants the best chance to thrive, starting right from when you buy them.
Look after your purchases
Many a time I’ve gone into a plant-buying frenzy, taken my new purchases home, failed to plant them immediately, then completely forgotten about them. I didn’t mean to neglect them – it was just carelessness – but I should have been taking good care of them until I got around to planting.
Place your plants
Before you put them in the ground, arrange all of the plants where you want them to go, and visualise how they’ll look growing together. Think your combinations through, and try to mentally double-check that they’re in the right place. Have you got the right mix of colours? A good balance of form and foliage? Enough space for them to grow? Are your hedges straight?
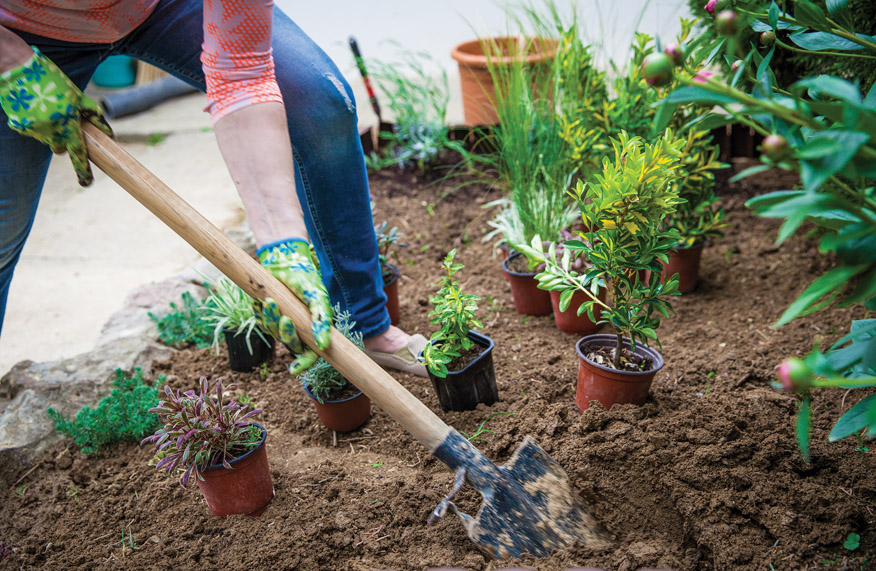
Plant them up
- Dig a hole about twice the width of the pot, and just a little deeper. If you haven’t already done some soil preparation, mix some compost into the soil that you’ve excavated.
- Soak your plant in a bucket of water for 5-10 minutes to saturate the mix.
- Remove the plant carefully from its pot, place it in the hole, then backfill around it.
- Tamp the soil down gently around the plant, then shape the soil to create a dish shape to catch water, and water well.
- Finish off by covering the oil with a 5-7cm layer of mulch to help conserve soil moisture and inhibit weed growth.
Watch out for water levels
Attention to watering should be the main focus as your newly planted babies settle in. Water them frequently until their roots are established and they can either fend for themselves, or be watered on a regular basis as needed – depending on the plants, their position and your climate.
Most new plants will benefit from a regular application of seaweed solution to reduce transplant shock and encourage root development. Once they’ve settled in, give them some fertiliser as a kick along.
Header image by Luke Simon


