Plant brussels sprouts
2024-10-01T15:06:38+10:00
Early summer is the time to plant brussels sprouts. They’ll take a while to grow and require careful management, but you’ll reap rich rewards.
To me, brussels sprouts are the crown jewels of the cabbage family (Brassicaceae). Whenever I have a crop in the ground, I’m quick to invite gardening friends over for a royal visit (bow and curtsy if you must). The plants look so grand in the patch, with their attractive foliage and tall stems decorated with plump edible buds. On the plate, every tiny cabbage-like gem is a delicacy.
Gardeners are often fearful and uncertain about growing something so special, but I’ve found them surprisingly easy to raise once you get a few things right. One thing is certain: if you treat the plants like royalty, you’ll be rewarded with a bumper crop.
Getting started
The first crucial requirement is climate. Brussels sprouts like cold winters. If you live in a temperate climate area, you’re in business. If you’re in a warmer marginal area, give them a try anyway.
The second is timing. These plants need a long growing season – much longer than broccoli and cauliflower. Plant brussels sprouts in early summer, before the end of December. That way, by the time the cooler conditions arrive, the plants will be well established and ready to form sprouts.
Sow seeds 1cm deep in punnets filled with premium seed-raising mix and keep moist. They’ll come up in a week or so. Once seedlings are big enough to handle, pot them up individually in 10cm pots filled with premium potting mix, and grow them on. It’s going to be hot, so set them up under a frame covered with shadecloth (a 30 per cent shade rating is best). The cover will help to keep cabbage white butterfly at bay, too. Like most brassicas, brussels sprouts are susceptible to attack from their larvae, and the seedling stage is when they are most vulnerable to serious damage.
Growing and harvesting
Prepare a bed in a sunny spot that’s also protected from strong winds. The plants can get quite tall and top heavy, making them prone to falling over when it’s blowy.
The soil also needs to be fertile and well drained. When preparing the bed, add plenty of compost or well-rotted animal manure, and mound the soil where necessary to improve drainage. Incorporate organic fertiliser too, such as blood and bone or pelletised poultry manure. Check the pH. If it’s below 6, add lime or dolomite to raise it.
When your seedlings are established, plant them out 60cm apart. Plant deeply (up to the first leaves) to give plants more stability. It’ll be midsummer by then, so continue to shade the plants to keep them cool. Water regularly and deeply, and give them more organic fertiliser every six weeks – these are hungry plants.
Come March/April, as conditions become cooler, remove the shadecloth and replace it with pest exclusion netting to continue protection from cabbage white butterfly. Alternatively, spray plants with Dipel once a fortnight, or check them every few days to remove eggs and caterpillars by hand.
As the plants grow, help stabilise them by hilling up a little soil around the base. I sometimes put a few small bamboo stakes around each plant to keep them upright. You can also remove a few lower leaves each week to reduce wind resistance.
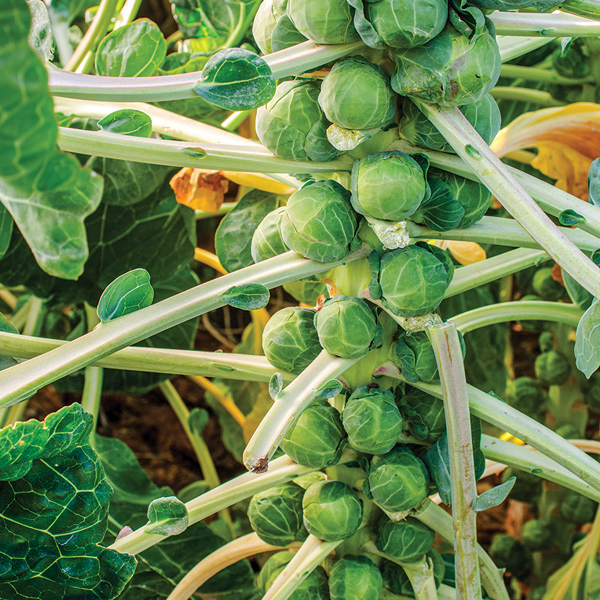
The first sprouts should appear at the bottom of the stem in late autumn or early winter and continue to form up the stem. Pick sprouts once they’re about the size of a walnut. Harvest with a sharp knife, or twist and snap them off. Towards the end of the season, the top knot of leaves can be removed and cooked like a mini cabbage. It’s delicious, so don’t waste it!
Header image credit: iStock