
Propagating native plants
2024-02-01T10:09:41+11:00
Keen to start propagating Australian natives? You’ll feel confident to give it a go with these expert tips and tricks.
Creating new plants from stem cuttings is a great way to fill your garden with greenery without breaking the bank, and there’s always room for more plants, right? Australian plants can be trickier to grow from cuttings than exotics, so we asked propagation expert Sue Stevens for her tips. Sue started propagating when she was 16 years old and has specialised in growing native plants for wholesale nurseries for more than 15 years.
Apply root hormone
Sue is adamant that applying hormones when propagating native plants results in a more vigorous root system. She uses the rooting hormone indole-3-butyric acid, either as a gel (labelled 3g per litre) or a powder (labelled 3g per kg). If you have a weaker strength hormone, simply apply more to the stem, but if you’re using a 3g/L or 3g/kg strength, be aware that more is not better and could hinder growth. If your cuttings turn bright yellow, you may have applied too much.
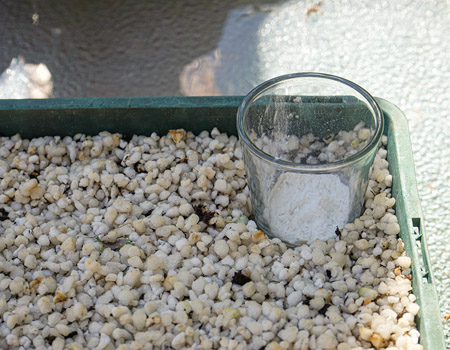
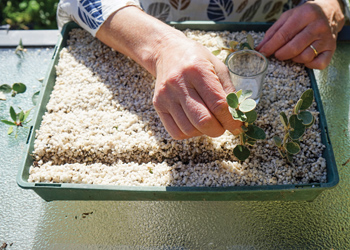
When applying rooting hormone, put a small amount of powder or gel into a separate container (below) to prevent the unused portion from becoming contaminated. Move it closer to where you are working to prevent spills. When using powder, dip the cutting in water, then the powder, then tap to remove excess.
Location and maintenance
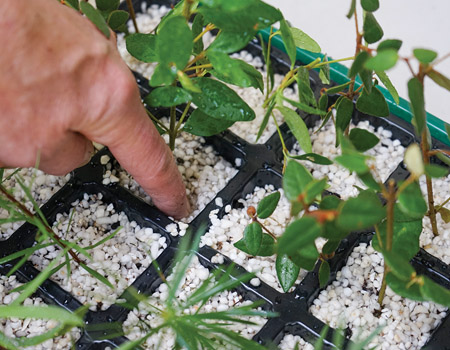
If practical, place the propagating tray or mini-greenhouse on a gentle heat source, such as the top of a hot water system, to encourage faster root growth. Check the growing medium weekly (below) and water as required. It’s fine to leave 1.5cm of water in the bottom of the tray – this will prevent it from drying out if you forget to check it!
Plants with soft, silvery foliage are harder to propagate, as they succumb to disease more quickly. To prevent stem rot, keep the medium slightly drier than you would usually, but don’t let it dry out completely.
Potting up seedlings
Native cuttings can take anywhere from three weeks to a year to grow roots. Make sure you remember to water them! New growth usually appears before roots have formed – a sign that the cutting is going to grow roots and you’ve succeeded… so far!
When roots eventually form, it’s time to pot up the seedlings. Peat pots are ideal because you can plant them directly in the ground or a bigger pot when the plant is ready without disturbing the roots. Soak your peat pots until saturated – they dry out more quickly than plastic pots, so you’ll need to keep the water up to them.
Remove the seedlings and gently knock the perlite off their roots (it’s okay if some remains). Pop each seedling into a peat pot filled with premium potting mix. Water, then put the pots back in the same warm spot until they’re ready for planting.
Propagate a native shrub
What you will need:
- cutting material from a plant
- secateurs
- hormone gel or powder
- mini-greenhouse or large tray
- medium-grade perlite
- coir peat (in a bag not a brick)
- dibbler and ruler
- plastic labels and a pencil
- container with water
- peat pots (for the future!)
- premium potting mix for natives
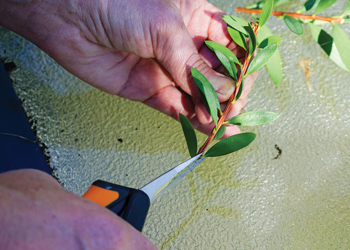
1 BEND the top of a stem to find where to start taking cuttings from. When the stem doesn’t bend easily, cut it! Discard that top bit, then, with the remaining stem, create cuttings of an even length, using the width of your hand as a measure. You may get between one and three cuttings per stem.
2 CUT the top section of the stem at an angle and cut the bottom section straight across, which will prevent rotting.
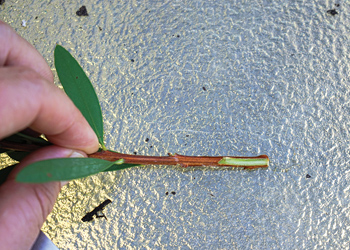
3 REMOVE the leaves from the lower third of the stem, and make sure there’s a minimum of three sets of leaves on the top two thirds. This ratio gives a better strike rate for native shrubs. Don’t cut the remaining leaves in half. This is especially true of glossy leaves, as they will drop off and the cutting could rot.
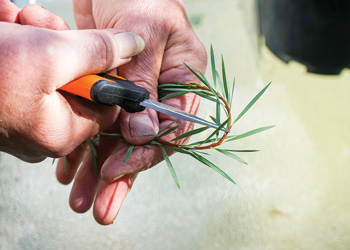
4 USE your fingers, rather than secateurs, to remove the leaves on soft, silvery plants. Doing this will prevent oxidisation and the eventual rotting of the stems.
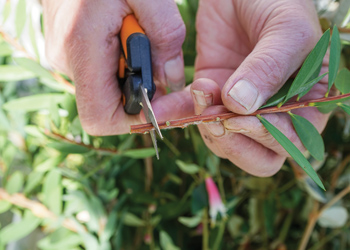
5 SCRAPE one side of woodier stems such as callistemon (and others in the eucalyptus family). These generally grow better with more water during propagation, and scraping the stem allows more water to penetrate. (Don’t do this on plants with softer stems, as they’ll rot if scraped.)
6 APPLY hormone gel or powder, covering approximately 1cm of the stem.
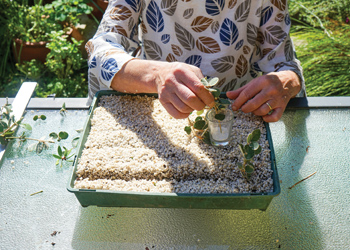
7 FILL a mini-greenhouse or large tray with a mix of perlite and coir peat, and use a dibbler (or a pencil) to make holes in the mix. If propagating native plants in a large tray, use a ruler to create straight rows for planting.
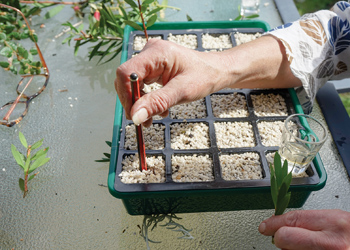
8 INSERT the cuttings up to the foliage (one-third below the soil and two-thirds above), and gently tamp perlite around the stems. Leave 2–3cm between cuttings in large trays to prevent diseases forming.
9 WRITE a label that includes the date, plant name and type of hormone used.
10 DRENCH the cuttings, then empty the water from the bottom tray so they’re not sitting in it. Pop the lid on (soft, silvery plants should be left uncovered) and place the cuttings outside in a semi-shaded spot. Keep the vents closed for a week, then open for a week, then remove the lid entirely.
Sue’s top tips for propagating native plants
- Jot down the propagation method you used as you go, so you can repeat what worked and change what didn’t.
- Grow cuttings in spring or autumn.
- Use healthy plants only – pests such as red spider mite can cause an entire batch of cuttings to fail.
- Use a semi-hardwood section of the plant’s stem because it contains more carbohydrates than soft wood and won’t need to be misted.
- Avoid taking cutting material from plants that are budding up or in flower, as they won’t strike easily.
Header image by AB Bishop


