
Start a vegie patch
2024-02-12T10:33:13+11:00
Do you want to create a vegie bed from scratch, but don’t know which method to use? In the March issue of our magazine, Phil Dudman explores a range of options for gardens of all sizes. Here are two methods…
Clear and cultivate
Advantage: Low cost
Disadvantage: Hard work
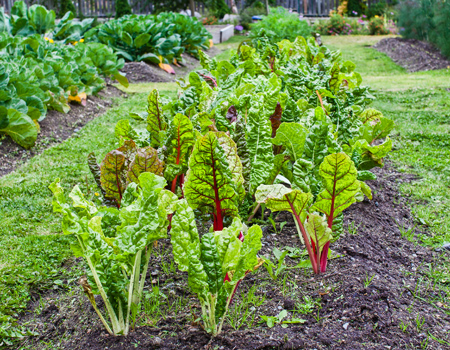
This is the original approach to starting a new vegie patch. All you need is a plot of ground, a sharp spade, a mattock (maybe), a garden fork, a steel rake and products to amend the soil, including compost, fertiliser and organic mulch.
1. MEASURE and mark out your bed with pegs and a string line or marking paint. Next, use your spade or mattock to dig out all the grass in the growing area. You don’t need to go too deep – just enough to remove the stolons (horizontal stems). Toss the grass in the compost bin (it’ll break down in a healthy compost heap) or pile it up in a spot where you can start a heap.
2. LOOSEN the soil by digging it over to a spade’s depth, breaking up large clods as you go, until you’ve achieved a ‘fine tilth’ – meaning the soil’s now easy to work with.
3. TIP on 2–3 buckets full of compost and a good handful of organic fertiliser per square metre. These amendments will feed the beneficial soil organisms while improving the structure of the soil and its capacity to hold moisture.
4. RAKE the soil until it’s level, water it well and cover the area with mulch. You can put a garden edge in too if your time and finances allow. Otherwise, just trim the edges regularly with a spade to stop the surrounding grass from growing into your new vegie bed.
No-dig
Advantage: Quick and easy
Disadvantage: Requires a lot of compost
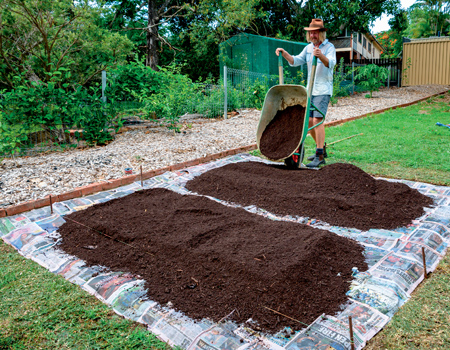
With this method, there’s no need to dig out the grass or till the soil. Instead, the vegie bed is built on the surface.
1. MAP out your growing area and mark it.
2. MOW the grass very short.
3. COVER the growing area with corrugated cardboard or newspaper (7–8 sheets thick), overlapping the edges. If it’s windy, wet the paper to stop it blowing away. Without sunshine, the grass below will die and rot.
4. TOP the paper with compost.
5. USE a steel rake to shape your new bed – the compost layer should be about 15cm deep. Compost is your initial growing medium. Don’t have enough homemade compost? Find a good bulk supplier! Rake in some organic fertiliser too, and then it’s time to get planting.
Note: Once the newspaper or cardboard barrier breaks down, worms and other soil organisms will work the compost into the soil. Every 6–12 months, add another layer of compost to the surface, 3–5cm thick.
Raised bed
Advantage: Tall and tidy
Disadvantage: Requires a lot of soil
Prefabricated raised beds (and DIY kits) look great and come in many shapes and sizes. They’re commonly made from timber or steel and are easy to set up. Simply smother the grass (see ‘No-dig’, above), position your bed and fill it with soil.
Some beds are tall, which means you won’t need to bend as much when tending to your plants. Keep in mind, the deeper the bed, the more you need to spend on filling it. Don’t be tempted to fill the base with brick, rocks, pebbles or polystyrene (you’ll end up regretting it). Instead, use cheap soil to fill the void, then top with 30cm of good quality soil and 10cm of compost. Alternatively, install a water reservoir at the base.
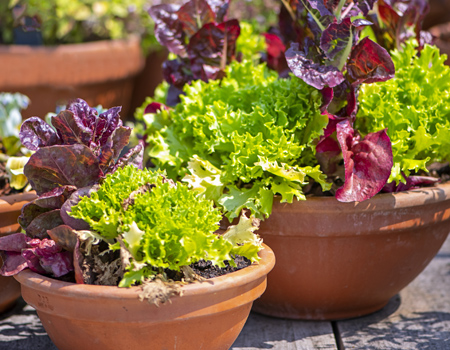
Containers
Advantage: Grow anywhere
Disadvantage: Can dry out quickly
With a few pots and some premium potting mix, you can set up a vegie garden in seconds on a balcony, deck or courtyard – even a rooftop. Plus, if you ever need to move, you can take your vegies with you!
Large containers are best. Pots that are 30cm in diameter are suitable for small vegies like lettuce, bush beans and spring onion. Use 40–50cm pots for tomato, zucchini and cabbage.
Keep in mind that vegies in pots dry out quicker than in the ground, and need to be watered more often. A little nutrient is flushed out every time you water, so you need to feed more regularly too. Self-watering pots solve this issue and are water efficient like wicking beds.
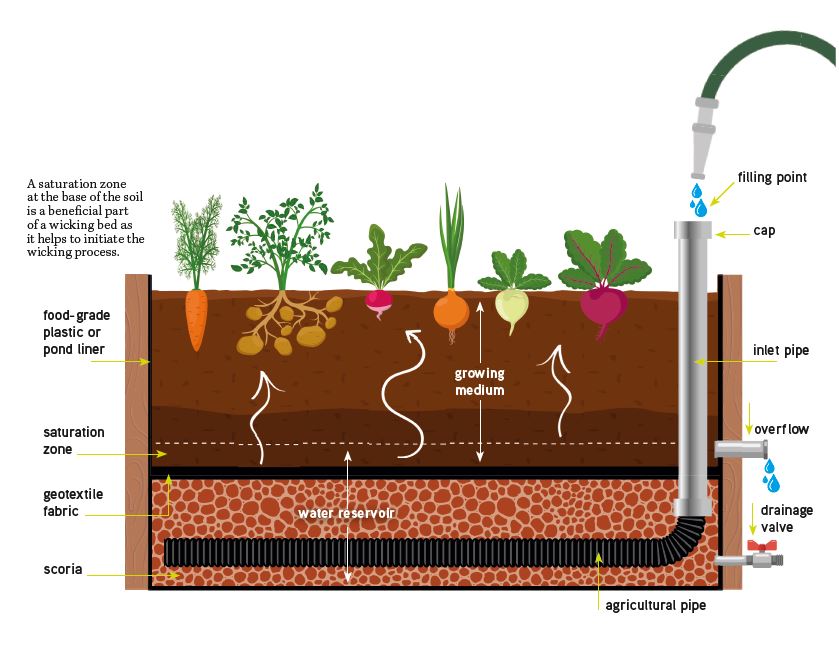
Wicking bed
Advantage: Water efficient
Disadvantage: Addictive
Wicking beds work on the principle of capillary action, with a water reservoir at the base and a wicking system that draws moisture into the growing medium. If there is water in the reservoir (added via a pipe), the root zone stays consistently moist, so you use less water, less often. The base is sealed, so it doesn’t need to make contact with the soil beneath. The bed can be set up anywhere, even on a patio.
There are commercial wicking beds available, or you can build one yourself using a raised bed frame, pond liner, porous aggregate such as scoria (to form the reservoir) and geotextile fabric. Look out for commercial wicking cells that can be used to create the water reservoir. These are the most efficient option and allow for higher water storage.
Header image credit: iStock


